Copying Annual Budget Reports
Financial Management > Reports > Annual Budget > Multiple reports
With annual budget reports, users often generate reports with the same criteria year after year. To avoid having to repeat the report criteria selection process every year, they can select a saved report and save it with a new name/year. However, in previous releases, the Balances to Include information cannot be saved and must be reselected.
Enhancements have been made to streamline this process. Users can now Copy an existing report and run it for a user-selected budget year, without having to reselect any of the report criteria including the Balances to Include criteria. It’s as easy as clicking Copy, renaming the report, and selecting the appropriate budget year. The report generation process does the rest. For step-by-step instructions of the copy process, see below.
This feature is available for all Annual Budget reports that include a Balances to Include section. ![]() click here.
click here.
Step-by-Step: Copying an Annual Budget Report
The following instructions describe how to copy an annual budget report and use it for a different budget year.
The Budget Worksheet Report is used here as an example, but the same instructions apply to all annual budget reports that include a Balances to Include section in their criteria.
-
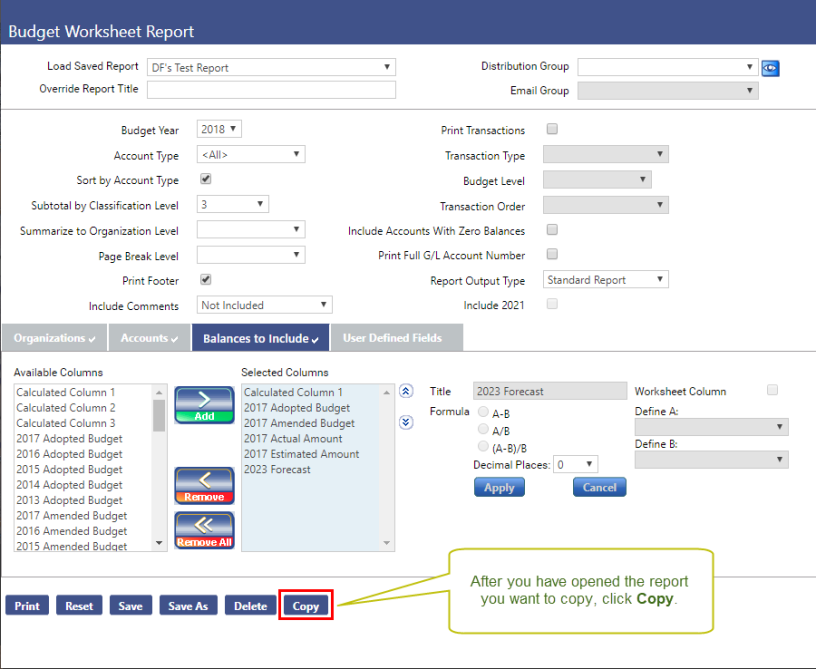
Open the annual budget report you would like to copy, and then click the Copy button at the bottom of the page.
-
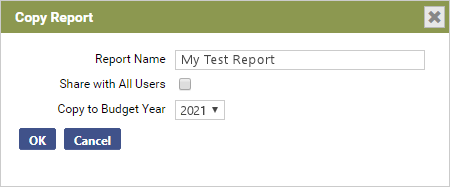
The Copy Report pop-up window will open.
-
In the Report Name field, enter a name for your new report.
Keep in mind that the copied report will be unaffected by the copy process. The report copy will become your new report identified by the name you enter here.
- If you would like to share your new report with all users, click the Share with All Users check box. Otherwise, leave the check box unselected.
- In the Copy to Budget Year field, enter the budget year for which you would like to generate the report.
- Click OK.
-
-
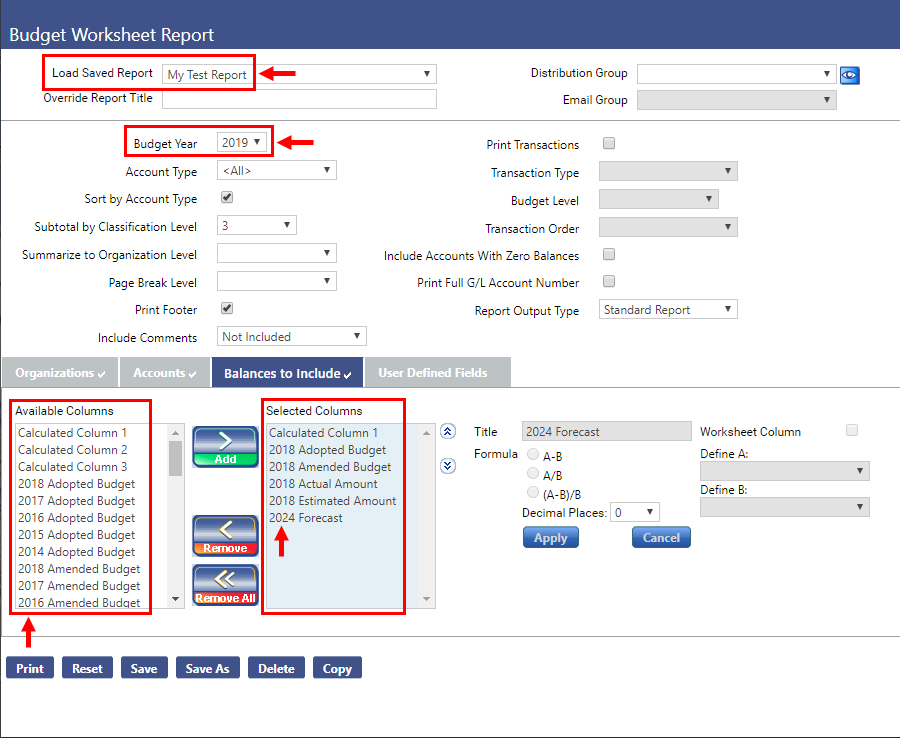
The report page will refresh to display the newly created report. Notice that the Load Saved Report field now reflects the report name you assigned to the new report in the previous step.
Notice, too, that the Budget Year field now reflects the budget year you entered in the previous step. All of the Organizations, Accounts, and Balances to Include information associated with the copied report has been retained, and all of the year-based column names in the Balances to Include tab have been adjusted to the appropriate years.

The report can now be printed for the selected budget year.